

With privacy being a major concern in today's world, learn how to browse privately on the web in 2023.
In 2023, living a private life online has become a luxury. Just like a coin, there are two sides when it comes to online privacy. One is what you do and the other is who you are.
Who you are is PIL (Personally Identifiable Information). PIL is nothing but information like your name, date of birth, address, phone number, and more.
What you do are the websites you visit, the articles you read, the music you listen to, and the things you shop online.
In this article, MacSecurity will explain how to browse privately on the web so you know what to do in order to stay safe and invisible online.
Related: How to Access the Dark Web Safely
How to Browse Privately on the Web
In order to browse privately, you will have to figure out what information is being tracked.
This information is tracked using certain in-built tools such as:
- Your IP address: An IP address is a series of numbers commonly assigned by your internet service provider (ISP) that is required for accessing the internet. This IP address can be logged by the websites you visit and can be used to track you later on.
- Your social media accounts: Companies like Facebook or Instagram capture your data to monitor your activity on those respective sites, along with other web pages, thanks to embedded code.
- Cookies: Cookies are small text files, stored by websites with a small amount of data (like a date and a unique ID). This is helpful so that the site can store login details and other important data to streamline and improve the browsing experience. Sadly cookies are also sometimes used to track users for advertising purposes which means it’s a risk to your privacy.
So is it easy to be anonymous online? The simple answer is No. It is impossible to completely remain anonymous but by using the below tools you can reduce your digital footprint the next time you’re online.
Incognito or Private Browsing

The first thing you can do to go private is to use the private browsing feature in your browser. This feature which is known as Incognito Mode in Chrome, Private Browsing in Firefox, and In-Private in Microsoft Edge makes sure that the browser doesn’t keep track of your browsing session.
It also makes sure that cookies and other site data are not tracked. This is extremely useful in cases where we want to quickly browse in private or even while using computers in a public place.
The only problem here is that your IP address is not masked which means any site you visit can still keep a track of your IP address and use this data to identify you.
Along with the website, even your ISP can keep the track of your browsing history thus storing a part of your identity.
Open Incognito Mode in Google Chrome:
To open the incognito mode in Google Chrome you will have to use these shortcuts or can do so by clicking on the 3 dots and selecting New Incognito Window or New Incognito Tab. Here's how to use shortcuts to open an incognito page:
- Windows/Linux/Chrome OS - Ctrl + Shift + N
- macOS - Press ⌘(Command) + Shift + N
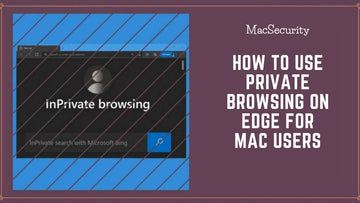
Open A New In-Private Window in Edge
Similar to Chrome, you can either open a Private browser in Microsoft Edge by tapping on the 3 dots and clicking on New In-Private Window or by using the following shortcut keys:
- Windows - Ctrl + Shift + N
- macOS - ⌘(Command) + Shift + N
Open A New Private Browser in Firefox
Firefox allows you to open a Private Browser by either tapping on the 3 dashes and clicking on New Private Window or by using the following key combination depending on your operating system:
- Windows - Ctrl + Shift + P
- macOS - ⌘(Command) + Shift + N
Open A New In-Private Window in Opera
Quite like the method for Chrome and Safari, you can open an In-Private browser in Opera by tapping on the 3 dots and clicking on New In-Private Window or by using the following shortcut keys:
- Windows - Ctrl + Shift + N
- macOS - ⌘(Command) + Shift + N
Do Not Track: Ask sites not to track you
What is it: Kindly asks sites to not track you.
What it does: Doesn’t stop sites from tracking you.
You can enable "Do Not Track" by navigating to the browser's options and selecting it. Unfortunately, this feature does not completely stop websites from tracking you, despite what you would believe. In principle, Do Not Track is a fantastic idea, but in fact, it hasn't been that effective.
The concept was to provide browsers with an optional setting that would allow users to indicate that they do not want to be tracked. Sites would consent to stop keeping an eye on such individuals, allowing users a little bit more control over their data.
The number of websites that honor Do Not Track is sadly ridiculously small. In terms of protecting your identity, turning on this feature won't do any good.
The most well-known Do Not Track substitutes that also block trackers are Ghostery and Privacy Badger. These are browser add-ons that enable you to easily stop trackers and display which services are monitoring your web traffic on any particular website.
Google Chrome
Step 1 Launch Chrome.

Step 2 Click the menu button in the top right corner (3 dots).
Step 3 Choose Settings.

Step 4 In the menu on the left, select Security and Privacy.

Step 5 Click Site data and cookies.
Step 6 Send a "Do Not Track" request with your browsing traffic by turning the switch to the on position.
Safari
Step 1 Launch Safari.
Step 2 Select Safari from the top menu.
Step 3 Then select Preferences.
Step 4 In the new window's top menu, select Privacy.
Step 5 Prevent cross-site tracking by checking the box next to it.
Firefox
Step 1 Fire up Firefox.

Step 2 Select the menu by clicking here (3 bars).
Step 3 Choose Settings.
Step 4 In the menu on the left, select Privacy & Security.

Step 5 Choose Always under Send websites a "Do Not Track" signal that you do not want to be monitored.
Edge

Step 1 Open Microsoft Edge.
Step 2 In the top right corner, select the menu (3 dots).
Step 3 Choose Settings.

Step 4 Click on Privacy, Search, and Services.
Step 5 Scroll down to Privacy and toggle on Send “Do Not Track” requests.
Ad Blockers

Ad blockers are a must-have plugin in today’s world. All sites nowadays not only serve ads but also personalize as per the user viewing them.
This personalization is possible because of the trackers present on the site. These Ad Blockers enhance your browsing experience by blocking the Ads.
A few Ad blockers also have the additional feature to disable the trackers so that you can have an invasive-free browsing session.
Another additional benefit you get by using the adblocker is that all the sites now load much faster. The best ad blockers I would recommend are Adblock and Ublock Origin.
You may also consider moving to more privacy-minded search engines, such as DuckDuckGo, a popular search engine that claims never to retain your personal data and does not track you for serving ads.
Using the Do Not Track Feature

If you’ve explored the browser settings then you must have noticed the Do Not Track feature. The idea of the feature is to let the website know that you’re uncomfortable with them tracking you.
With this feature enabled sites may choose not to track you. I used the word “may” as it is not mandatory for a website to actually go along with this request.
Some sites may also choose to reject it.
Secure DNS

Previously in the Incognito or Private Browsing section, I explained how the ISP can still keep the track of your browsing history.
So how does the ISP know? Is it black magic? AI from Skynet?
The answer is simple. It’s the Domain Name System or the DNS. Every connection on the Internet is dependent on the DNS or Domain Name System. The DNS is sort of a telephone directory, it keeps a mapping between a friendly URL (Name) and IP address (Phone Number).
So when you type in the name of your favorite site on your browser, your ISP takes care of converting this URL to the associated IP address and then redirects to the page. The problem with DNS used by the ISP is not so secure.
Most ISPs use this data to keep track of the websites you visit and then sell this data to advertisers.
To combat this problem you need to use a secure DNS. The common and known Secure DNS are OpenDNS and Google.
To set up Google DNS or OpenDNS, you can get started here and here respectively.
I would also recommend CloudFare DNS. Cloudflare DNS encrypts your internet traffic, doesn’t sell your data to advertisers, and doesn’t store your IP address for any longer than 24 hours.
CloudFlare DNS is also available for Android and iPhone devices. To set up Cloudflare you refer to this link.
Using VPN

VPN, also known as a “Virtual Private Network" is a process of enabling a protected network connection when using public networks.
VPNs masks you completely on the internet by encrypting your internet traffic in real-time which makes it more difficult for third parties to track your online activities and steal your data.
All the sites track us using the IP address, With the VPN enabled our IP address will be hidden and the VPNs IP address will be exposed thus confusing the site trackers or any other human being.
Most VPNs even value your privacy by not keeping the logs of your activity, Even if they do they do not pass on this data to advertisers.
Do remember that by using the VPN you won’t become completely hidden on the Internet, i.e if you’re logged into some account like Google the company can still track your activity through it.
Tor

Tor short for The Onion Router is an open-source privacy network that allows users to browse the web anonymously.
Tor works by bouncing your internet traffic through a series of random relay servers dotted across the world that scrambles your data and covers your tracks.
You get started by downloading the Tor browser (which is a modified version of Firefox) from here. The Tor browser is supported by Windows, OSX, Linux, and Android. This browser can access both regular and .onion sites (a special top-level domain that can be exclusively accessed using Tor).
The benefit of using Tor is that it makes tracking your activity impossible for anyone, which means they won’t know what site you're visiting or even your identity.
But before you jump in to install Tor, do remember that Tor isn’t a silver bullet. Even though the Tor browser is the most common way to access Tor, it also comes with its fair share of bugs and vulnerabilities.
In some cases, the FBI takes advantage of these vulnerabilities to expose cybercriminals using Tor. This means that even the privacy of common people like us is not safe too.
The best thing to do is keep the Tor browser up to date. Luckily The Tor Project, which maintains the technology, provides a list of suggestions to ensure you’re as protected as you can be.
Some of the suggestions are, not using web plug-ins, not downloading any type of files or other documents through Tor, and keeping an eye out for in-app warnings.
It’s better to use Tor when it’s important to be anonymous, and use another browser for day-to-day activities.
So what do I choose to truly become anonymous?
If you combine the above tools you can keep yourself anonymous the next time you browse the Internet. Here are a few examples:
- A VPN with private browsing: This process will hide your IP address from the outside world and also disable your cookies and sign-ins.
- Tor: As explained Tor is the best example when you want to browse anonymously.
- A VPN with Adblocker and Tracker Blocker enabled: This process that hides your IP address also makes sure that none of the website trackers can keep an eye on you.
- Tor with a VPN: For ultra-paranoid people, this is an even better example as it provides the maximum amount of possible layers between you and the outside world.
How to Browse Privately on the Web - Conclusion
Each of the above methods will significantly help you towards having a more private browsing session but do remember that being anonymous isn’t easy in today’s world. Internet giants such as Google can risk your privacy.
To start with, switch to an alternative search engine like DuckDuckGo (that values privacy) as search engines like Google can record everything you do online. When connecting to public Wi-Fi make sure that you’re using a VPN so that your connection can be secure.
These smaller things can help you get started on leading a private life online. Do make sure you’re up to date on recent security threats so that you can always remain one step ahead.
Till then, good luck and safe browsing!!
How to Browse Privately on the Web - FAQs
How Do I Turn on Private Browsing?
Why Can't I Open a Private Window on Safari?
Can Someone See My Browsing History If I Use Their Wi-Fi?
Can I See My Incognito History?
Also Read: